|
|
Post by TerraRoot on Jan 26, 2011 19:18:24 GMT
Plusgas is a vital component to any old bike rebuild, it's specially made for freeing seized nuts n bolts, AKA penetrating fluid, it doesn't have to be plusgas thats just a trademark/name.
it's truly useful stuff, quite a lot better then wd40.
|
|
|
|
Post by cerberus73 on Jan 26, 2011 22:49:00 GMT
shocks look like bog standard 330mm or 335mm units, loads on ebay, either with external or covered springs... a new pair of adjustable ones can be had for 30-60 quid depending on brand etc. looks likes a amal monobloc 376 carb... parts can be had from burton bike bits or surrey cycles... rebuild kits are cheap, did my T10 type 32 amal for less than 5 quid for a gasket n seal set. and a tin of carb cleaner for couple quid... engine number points to her being a D7 type 175cc bantam of around 1960... but i aint no authority on bsa bantams... my old man did own a good few over the years though... but she is definitely a D7 type 175cc bike so look for parts for that variant of the engine. when you say competition head, they were very basic little piston ported bikes with a basic combustion chamber shape. i think he might be refering to a competition barrel, and that would likely mean she has been ported and flowed, ie raised exhaust and intake ports, maybe a little polishing of same ports... if its done well she will have a little extra go over the standard bits, but if done badly it will have a ball hair width power band and be unusable as a practical form of transport at all, and hole pistons and seize like nobodies business
|
|
jonw
Retro Fitter

Posts: 145 
|
Post by jonw on Jan 27, 2011 15:04:03 GMT
|
|
grizz
Retro Apprentice
Posts: 49
|
Post by grizz on Jan 27, 2011 22:21:10 GMT
Quick update on the frame number "saga". Took the number board off the bike tonight, and scraped the headstock paint off on all sides. No numbers, and no apparant signs of numbers being removed at any point. Any further suggestions, theories ? I wonder if it is not some kind of a "Bitsa" bike. 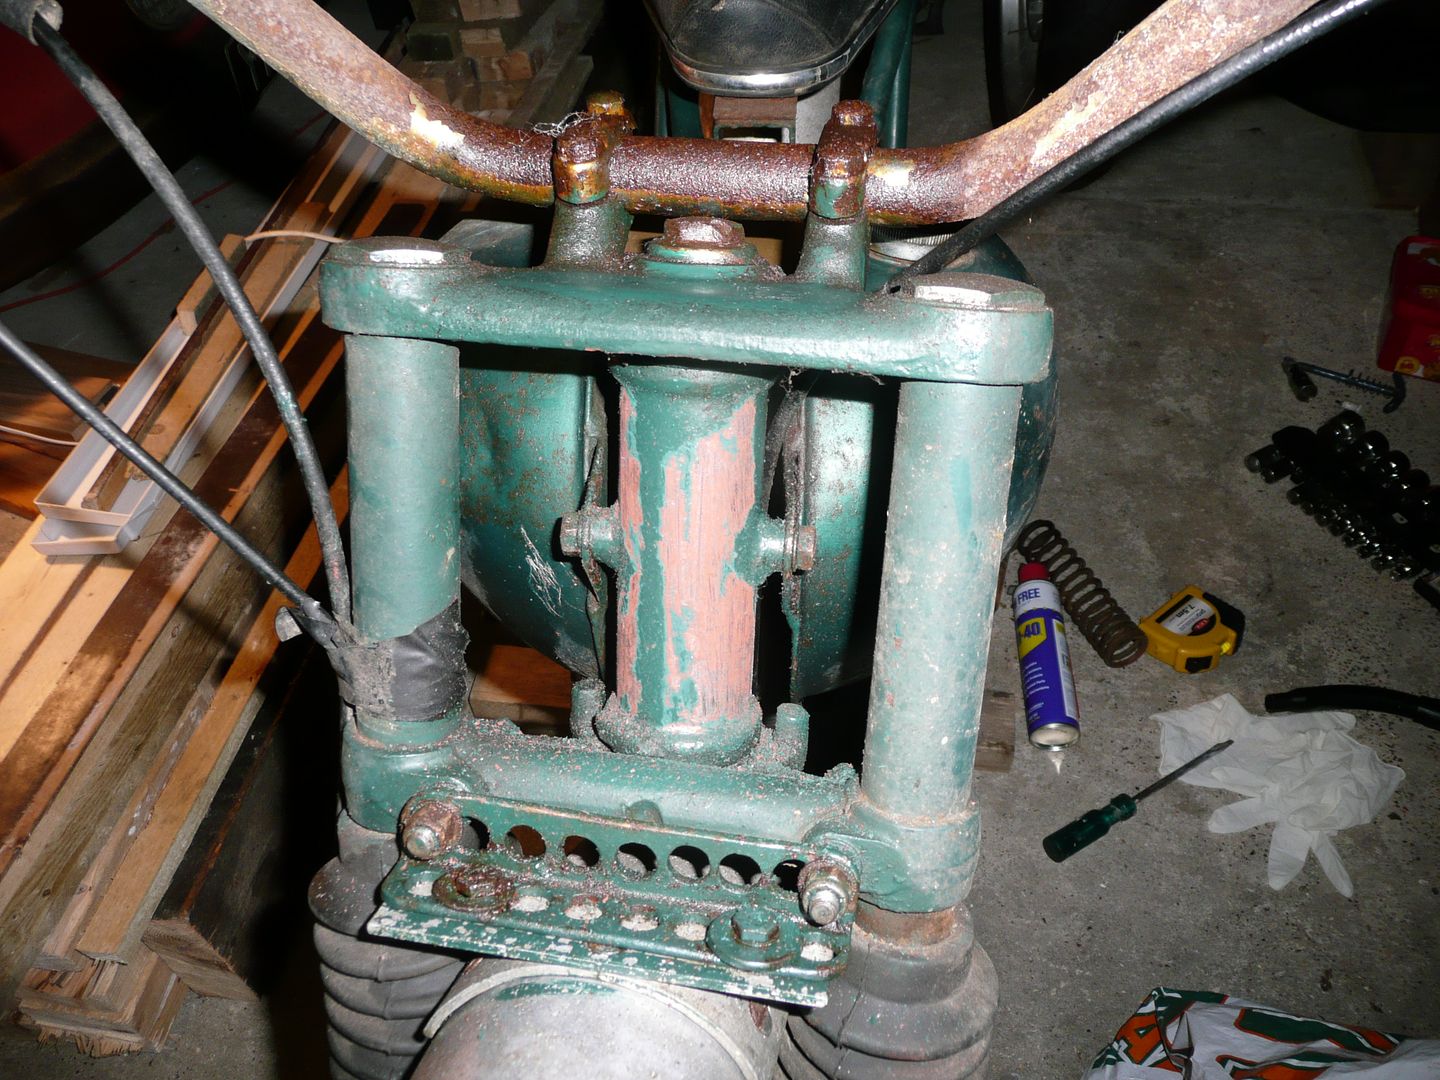 |
|
|
|
Post by cerberus73 on Jan 28, 2011 14:56:19 GMT
Could simply be a custom made frame for that bike, i would approach the VMCC to see if they have info on this bike, before you go doing to much to it, IF it is a historic machine, it would require a sympathetic resto. not done on a shoestring with incorrect parts. also could be worthwhile moneywise, as if it has a traceable history, then it will be worth a lot more than a bog standard D7 bantam. and probably be better off in the hands of a specialist.... like sammy miller  |
|
grizz
Retro Apprentice
Posts: 49
|
Post by grizz on Jan 30, 2011 16:03:31 GMT
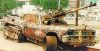
 Popcorn time for those of you following my fun and games with the "Bitsa Bantam" Spent a few hours in the garage today. The mystery of the frame number that is not there, continues. Checked lugs, under tank, and inderneatht the frame. At this point the ideal would probably be to have some very clever BSA specialist/anorak check over the frame, to see where the number that I cannot seem to find, is hiding.  After another 24 hours with some diesel on the plug, it still would not budge, so "Plan B" was set in motion. Again, not all plain sailing, as one of the nuts would not release at the top, but was quite happy to come out the bottom end. Later after a few hours in diesel, and screwed into the vice, it continued to have a mind of its own, so now it is back in the diesel bath along with the head and chain.  With the head pulled off, I was greeted by a load of crumbly dirt on top of the piston, and some rust on the bore.  Plug seemed to be part of the whole thing from the inside as well, so is now sat in the diesel bath with diesel all over the inner surface. 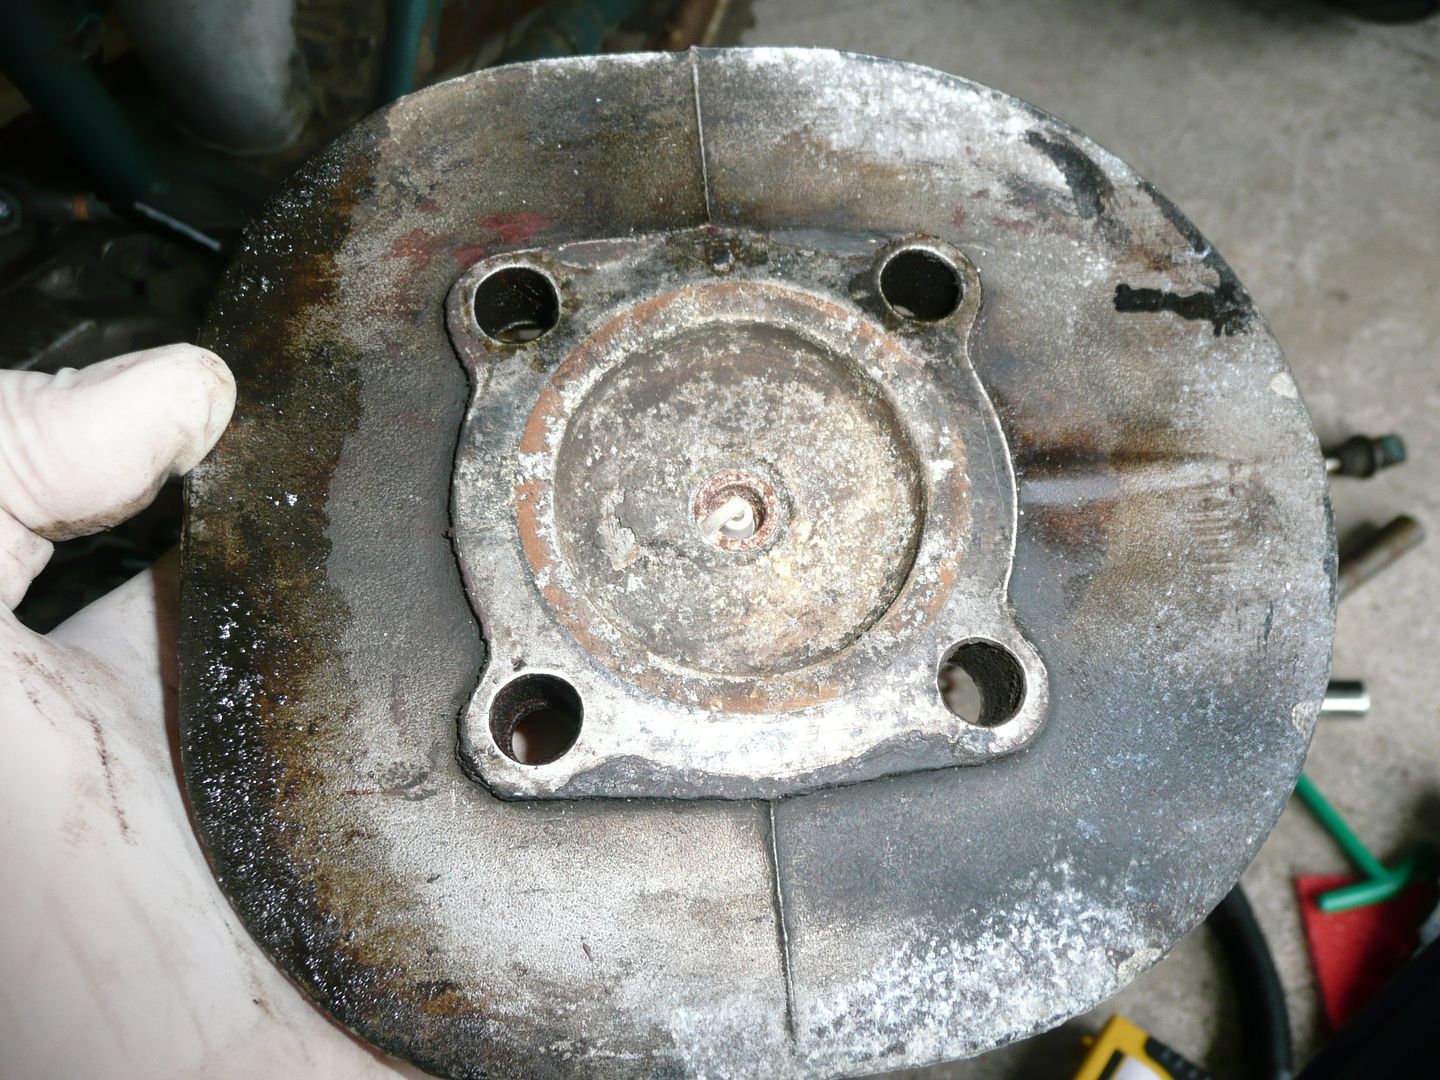 The rest does not look much better, and WD40 and Diesel , helped along with some force from a 5 pound hammer and a piece of wood on top of the piston , has seen no change in position of the piston.  While I was at it, I also removed the carburetor to get some WD40 inside the head under the piston, in case it helps. Got the throttle and controls off, with some more wood and hammer action, throttle was really rusted to the handlebar, and the inside is badly pitted, with about 2/3 of it rusted. I would think that new handlebars may be in order if I can get the engine fired up, and if the gearbox plays along. 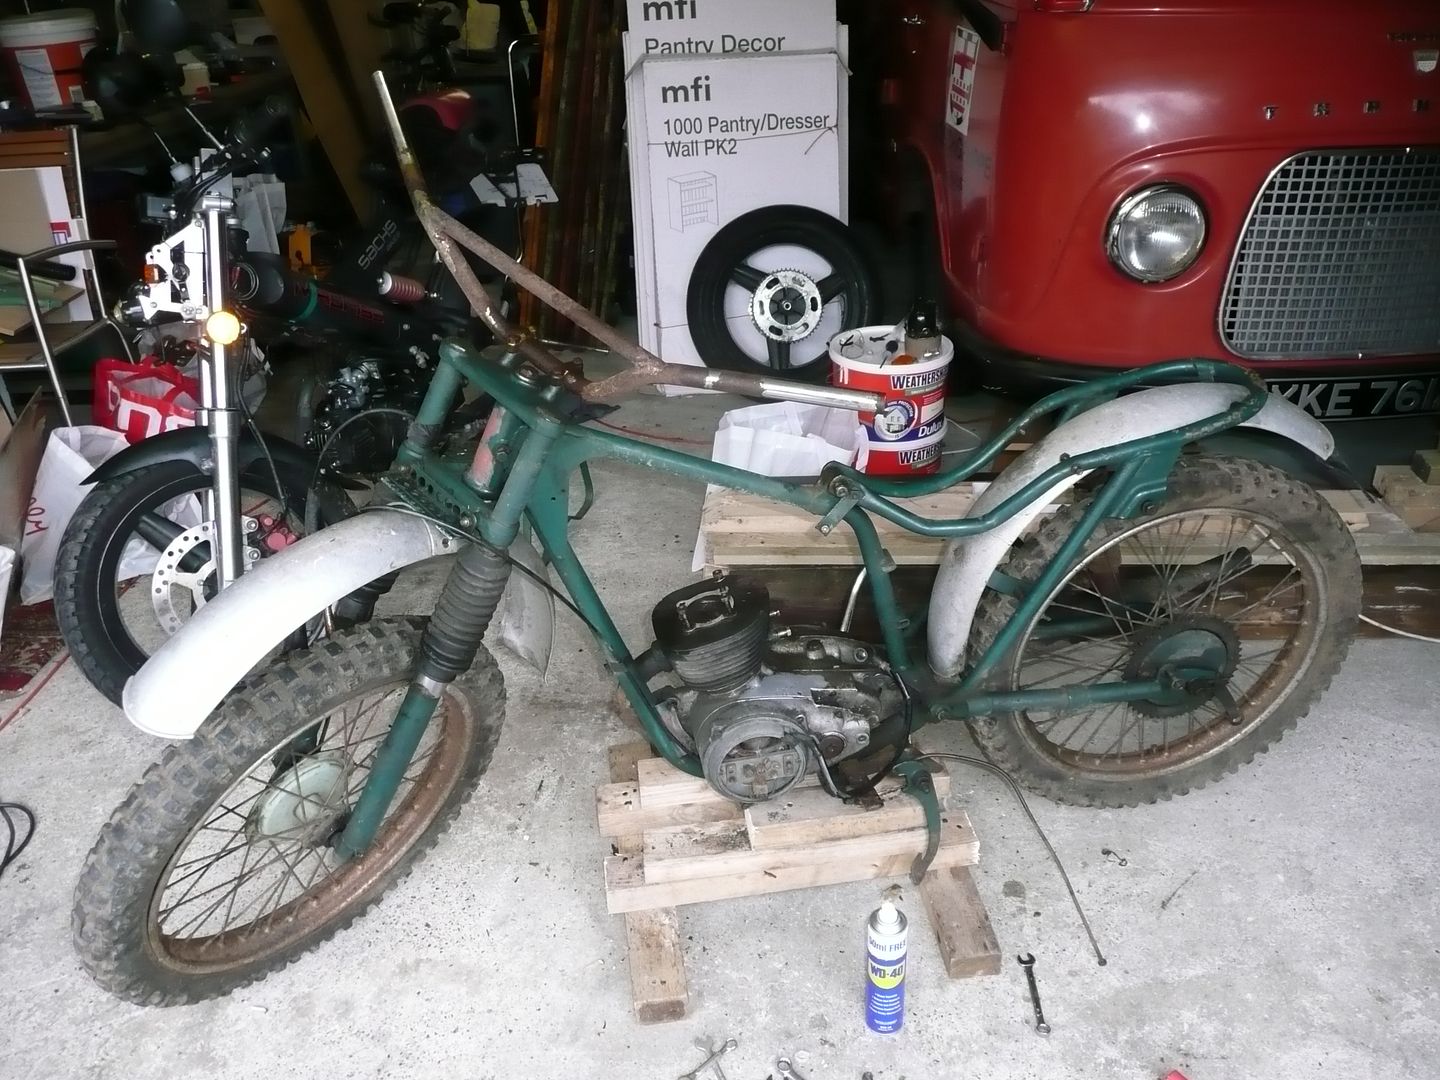 Once the seat was off, the bend in the rear subframe became more visible, also showing a weld on the left side, to the right of the photo. Not sure why it had been welded, but seems a neat enough job. 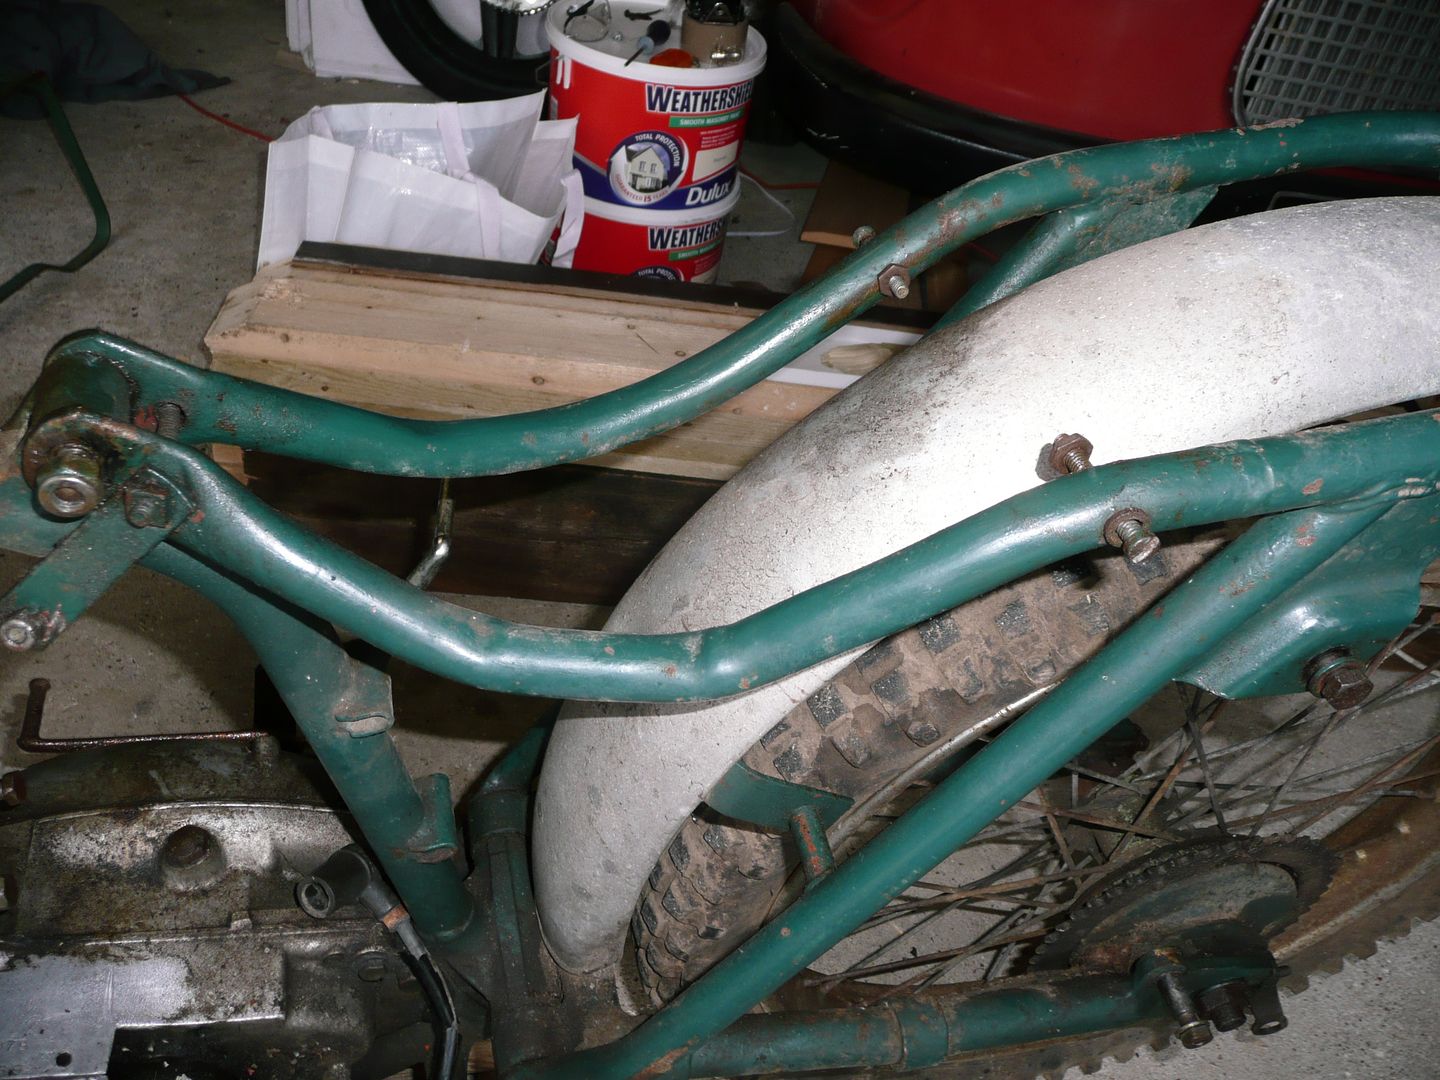 The parts removed today in neat order, as I need to work that way, so as to be able to reverse the process at some point when rebuilding it all. Note all the loose rust from the tank, seems there is a lot of corrosion pretty much everywhere on this bike.  Parked up the bike at this point with the diesel topped up on the piston. Lets hope it goes somewhere in the next few days (I mean downward) |
|
jonw
Retro Fitter
Posts: 145
|
Post by jonw on Jan 31, 2011 10:19:55 GMT
Am wondering if your frame is off of a Triumph Tiger cub and not a Bantam. Later cubs used Bantam frames and were nicknamed Bantam Cubs because of this. I'll check the Tiger cub bible when I get home and see if I can find that number.
|
|
grizz
Retro Apprentice
Posts: 49
|
Post by grizz on Feb 1, 2011 18:49:40 GMT
Am wondering if your frame is off of a Triumph Tiger cub and not a Bantam. Later cubs used Bantam frames and were nicknamed Bantam Cubs because of this. I'll check the Tiger cub bible when I get home and see if I can find that number. Thanks Jon, I did go have a look around the frame pipes, both front and top, and still not a number to be seen. Today I went and spemt some money and got some ATF, and 2 x 50ml bottles of acetone. For some reason the pharmacist said it cannot be sold in decent quantities for some silly health and safety reason. 1l ATF - £4.99 2x50ml Acetone - £3.04 Will mix 100ml of each tomorrow some time and get that onto the barrel and one side of the head to see what it gets up to. The only heat I have at home is an electric heatgun for stripping paint etc, so that will be "Plan D" if the next mix fails to penetrate and release everything. 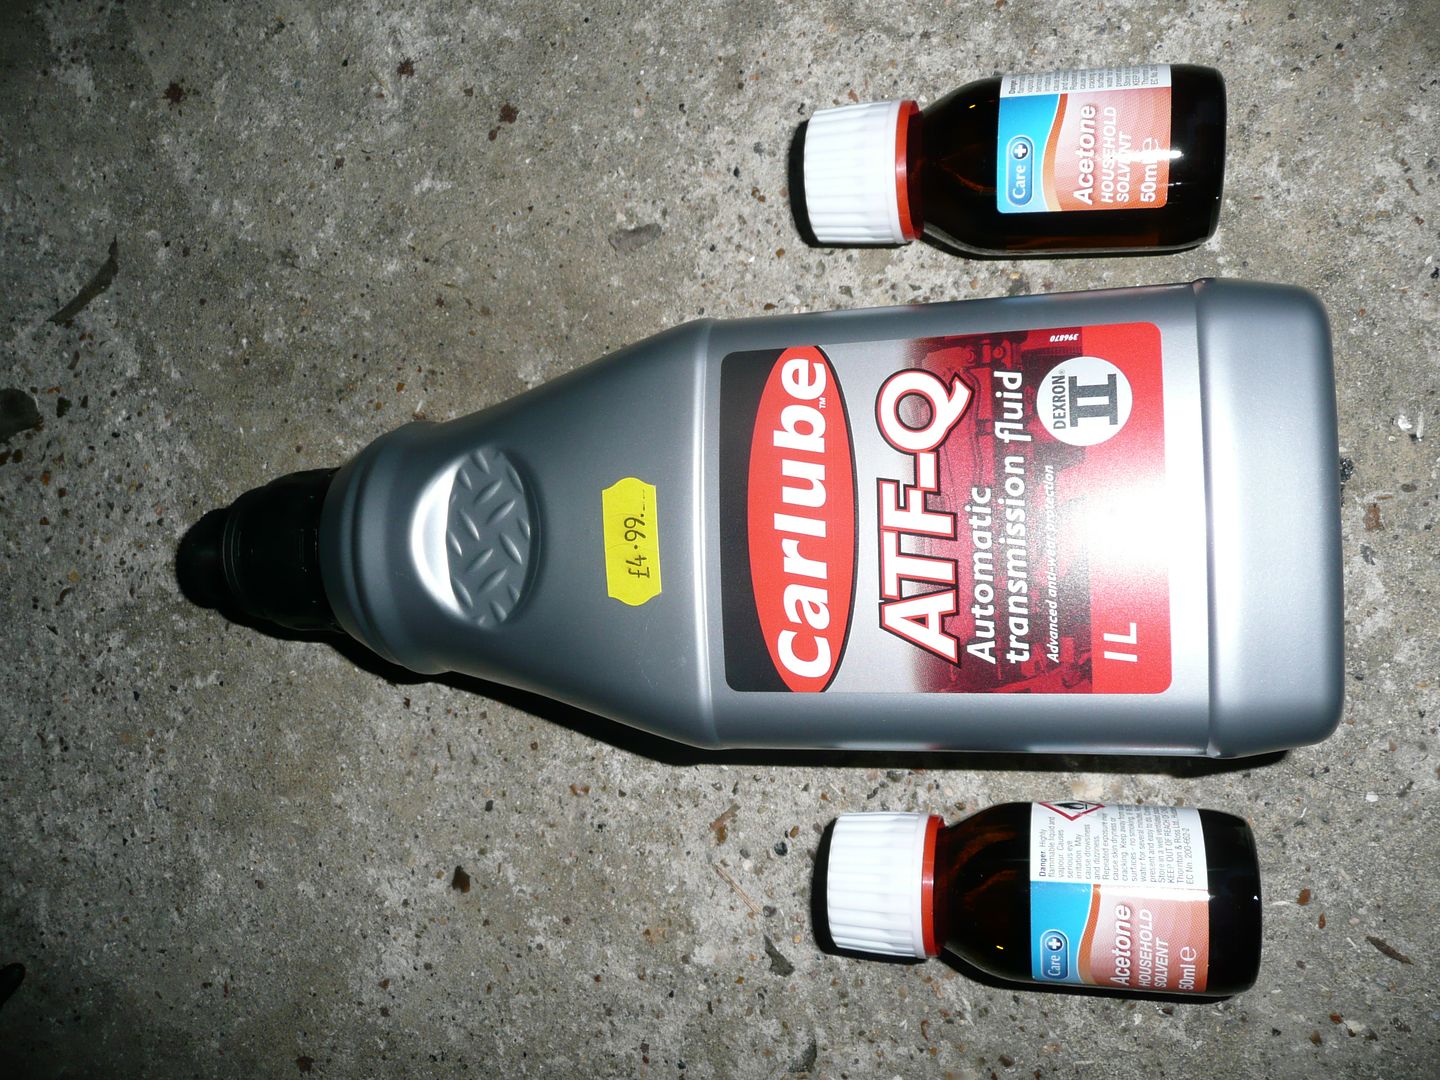 |
|
93fxdl
Retro Apprentice
Posts: 58
|
Post by 93fxdl on Feb 1, 2011 19:59:53 GMT
ok lets take the easy one first,
the way to loosen nuts on studs/bolts is a large portion of "hammer time", the way to do it is, lay it on a solid object so one flat of the nut is flat then give the top flat a few good taps with your "adjusting" hammer then rotate a flat and repeat, this will loosen the nut and you can then use the vice and spanner to remove, you may have to undo a bit then repeat the hitting process
the seized plug looks a bit more fun but no biggie, first it may be an idea to bolt it back onto the engine or make a support to hold it in place as just the head will be a bit difficult to keep steady while heaving on the plug, an idea for a support, is two lengths of bar held in the vice so the head drops onto them then find the tightest fitting socket you have, prefferably one that needs a few taps from the "adjusting"hammer to fit on, then a decent size breaker bar or preferably an impact gun and "rattle" it tight and loose to try and free the threads, dont just try and screw it straight out or you will almost certainly take the threads out, since you dont have a vital pice to this puzzle (blowlamp) a couple of ways of applying heat are, run a weld around the top of the plug, or stick the whole thing in the oven ( if chain can go in the dishwasher why not use the oven too?)
finaly the big one, the piston first get your penetrating mix up the exhaust port and the inlet port also lift the barrel up the studs and with the engine upside down get the mix into the transfer ports the idea being to get to all surfaces of the piston but then leave to soak
there is a chance the piston is free(ish) but the crank is stuck this will become apparent when you try and lift the barrel but it may be stuck on the studs
ttfn glenn
sorry if this sounds a bit like an idiots guide but you wouldnt believe some of the people i have worked with
|
|
grizz
Retro Apprentice
Posts: 49
|
Post by grizz on Feb 1, 2011 22:26:15 GMT
ok lets take the easy one first, the way to loosen nuts on studs/bolts is a large portion of "hammer time", the way to do it is, lay it on a solid object so one flat of the nut is flat then give the top flat a few good taps with your "adjusting" hammer then rotate a flat and repeat, this will loosen the nut and you can then use the vice and spanner to remove, you may have to undo a bit then repeat the hitting process the seized plug looks a bit more fun but no biggie, first it may be an idea to bolt it back onto the engine or make a support to hold it in place as just the head will be a bit difficult to keep steady while heaving on the plug, an idea for a support, is two lengths of bar held in the vice so the head drops onto them then find the tightest fitting socket you have, prefferably one that needs a few taps from the "adjusting"hammer to fit on, then a decent size breaker bar or preferably an impact gun and "rattle" it tight and loose to try and free the threads, dont just try and screw it straight out or you will almost certainly take the threads out, since you dont have a vital pice to this puzzle (blowlamp) a couple of ways of applying heat are, run a weld around the top of the plug, or stick the whole thing in the oven ( if chain can go in the dishwasher why not use the oven too?) finaly the big one, the piston first get your penetrating mix up the exhaust port and the inlet port also lift the barrel up the studs and with the engine upside down get the mix into the transfer ports the idea being to get to all surfaces of the piston but then leave to soak there is a chance the piston is free(ish) but the crank is stuck this will become apparent when you try and lift the barrel but it may be stuck on the studs ttfn glenn sorry if this sounds a bit like an idiots guide but you wouldnt believe some of the people i have worked with Thanks for all that Glen, Trust me, I am more than happy to be guided here, never done this sort of thing before, so it is all new to me. |
|
|
|
Post by TerraRoot on Feb 2, 2011 7:55:31 GMT
Never heard of atf and acetone for penetrateing fluid, let us know how you get one with it.
|
|
jonw
Retro Fitter
Posts: 145
|
Post by jonw on Feb 2, 2011 8:18:27 GMT
I seem to remember someone mentioning this.... but never seen it used. Good luck and keep us posted.
Sorry, didn't get to the book last night....
|
|
grizz
Retro Apprentice
Posts: 49
|
Post by grizz on Feb 2, 2011 11:05:08 GMT
Never heard of atf and acetone for penetrateing fluid, let us know how you get one with it. Copied from a post in my garage thread on www.garagejournal.comI got a liter of acetone on Ebay for £7 delivered last night. 5 liter is about £11 plus post, should have been more patient. "The April/May 2007 edition of Machinist's Workshop did a test of penetrating oils where they measured the force required to loosen rusty test devices. Buy the issue if you want to see how they did the test. The results reported were interesting. The lower the number of pounds the better. Mighty interesting results for simple acetone and tranny fluid! Penetrating oil . Average load .. Price per fluid ounce None ................. 516 pounds . WD-40 .............. 238 pounds .. $0.25 PB Blaster ......... 214 pounds .. $0.35 Liquid Wrench ... 127 pounds .. $0.21 Kano Kroil ........ 106 pounds .. $0.75 ATF-Acetone mix.. 53 pounds .. $0.10 The ATF-Acetone mix was a 50/50 mix (1 to 1 ratio)." The author of the original article has confirmed this on the MW forum. (General - The Home Shop Machinist & Machinist's Workshop BBS) I've used it with good results. |
|
grizz
Retro Apprentice
Posts: 49
|
Post by grizz on Feb 3, 2011 17:17:36 GMT
Massive thanks to Timolgra for packing them and posting them off to help get this Bitsa Rust and Bitsa BSA back on the road.  In other news, those with a keen eye will see that the stud that had the seized nut attached to it, is now back in place, with a shiny nut on it. I took a 5lb hammer and used the coaxing method of getting it unstuck. Part of the thread stayed behind, so I used the new nut to rerun the thread to a point where I can get it in as deep as it is now. I suspect these studs are threaded in BSW, BSF or BSC and who knows what else ?? Fingers crossed it all comes together in the end again. 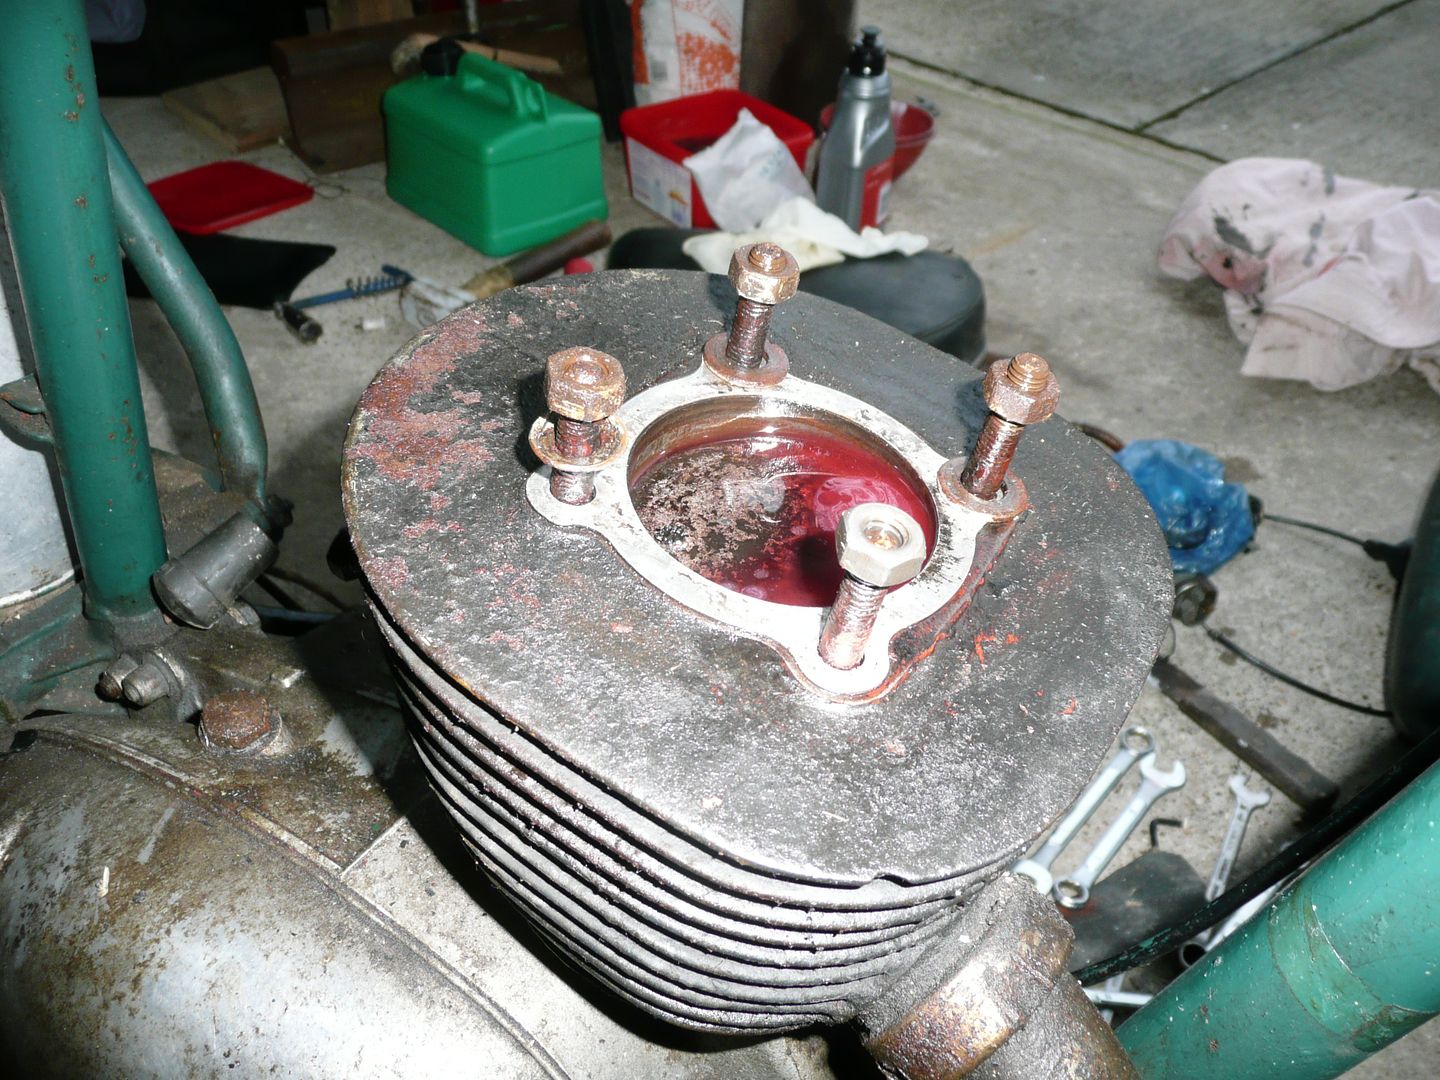 |
|
|
|
Post by twoblackcats on Feb 3, 2011 21:16:21 GMT
Great project you got there grizz, nice price too  Good luck with the unseizing. If the potion don't free it maybe some heat will. |
|